Mapper(s)
zaltar + kaoz
BK Version
OA
Player Party
Allies + Germany
AI Opponent
USSR
Map Season
Summer
Map Date
1944
Map Size
15 x 15
Date Released
09/2014
File Size
1.477KB
Map Info
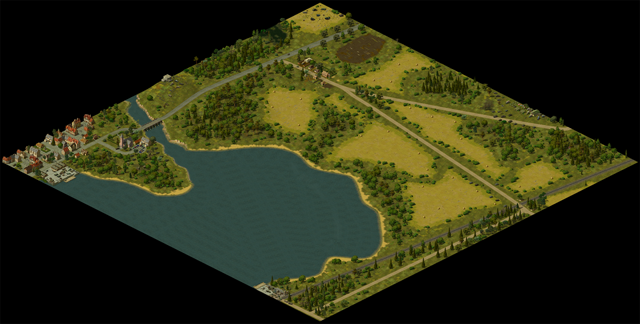
This is the fourth map of the 10 Race For Dominion chapter, included in the Operation Apocalypse mod.
Comments
Map walkthrough
In this map, you'll have to deal with enemy attacks that spawn after they die. They will come from the south, from the north and the northeast. The attacks are not that hard, but they'll make it difficult to move forward, especially when in range of enemy artillery. If you organize and prepare well, you should however be able to deal with them, even infinitely... but at some point, you'll need to move forward...
When you manage to trap some tanks and keep them alive, they will no longer spawn and in that case, this map could become way much easier. Next to that, you should keep an eye on the time (it takes) between the spawn intervals, so you move forward at a good timing. And you might need a bit of luck. There are three trigger points that will end the spawning, once you'll reach these points. You might try to, immediately, go for these points, but that would be costly and you might not survive.
On the road in the southeast, you'll find some French reinforcements. Chances are small these tanks can reach trigger #1 in time, therefor it is better to move to the forest border on the right, looking over the field. Immediately, lay some mines at strategic places there, before the enemy arrives. And build trenches. After one or two attacks, you could try reaching trigger #1. You then might have to deal with one last spawn, but that should be possible. Then deal with the whole of the south, so the enemy artillery there won't be any longer a thorn in your side.
At the same time, you will have to take on a few attacks from the north as well. Do measure the time you have between the spawn intervals, so you can lay a few mines and trap some tanks. Then when it becomes easier, try to take the town (trigger #2) from the left and the right in a swift attack.
Trigger #3 will be the hardest, being a stronghold. You might want to shell it before attacking it. When you've dealt with it, you still need to occupy the town across the bridge. You also might want to shell the many stalin-organs there before entering. Your sniper can help with that.